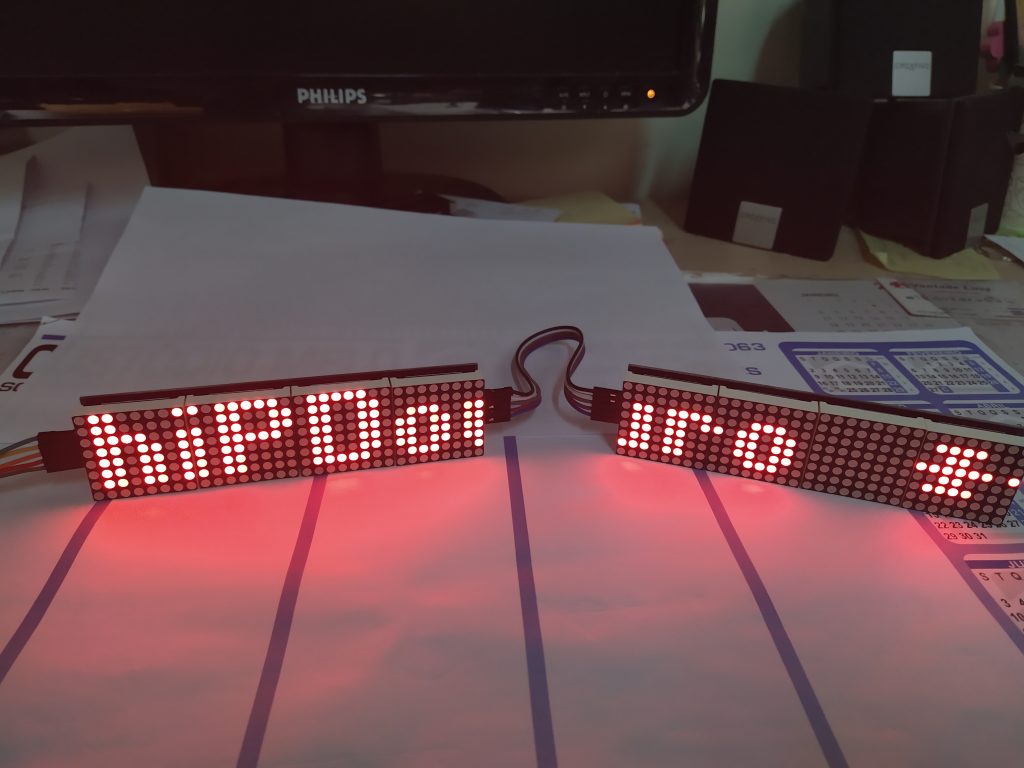
Painel led com matrix 8×8 (Max7912), 4 segmentos para controlo arduino.
Painel Led – Max7219 com 4 matrizes 8×8
Cada painel tem 4 matrizes de led 8×8 e 4 CI´s Max7219, sendo que cada um controla uma matriz.
Os quatro módulos estão interligados, pinos Vcc, GND, DIN/DOUT, CS e CLK.
Os pinos de controle (Din/Dout, CS e CLK) permitem o controle total das matrizes, que podem funcionar em conjunto ou individualmente.
Cada modulo tem setas na parte de baixo, onde se pode ver a inscrição IN/OUT sendo este o sentido dos dados do display (entrar – DIN, sair – DOUT).
No lado direito do modulo (saída) temos os pinos sem conexão, que podem ser usados para soldar de uma barra de pinos e conecta-los a outro módulo, formando painéis maiores.
Conexão do módulo no Arduino Uno
A conexão do módulo é feita por 3 pinos de controle: DIN, CS e CLK, conectados aos pinos digitais correspondente no código.
O pino Vcc deve ser ligado à alimentação 5V – pino 5V do Arduino Uno, o pino GND, ligar ao GND do Arduino Uno.
Código no Arduino Uno
Depois de realizar várias pesquisas, visitar vários sites chegou-se a um código com o qual se obtém o resultado desejado, a passagem das letras de forma a perceber a mensagem, ou seja de forma correta.
Assim aqui fica o código já editado:
#include
#include

#define USE_POT_CONTROL 1
#define PRINT_CALLBACK  0

#define PRINT(s, v) { Serial.print(F(s)); Serial.print(v); }


#define HARDWARE_TYPE MD_MAX72XX::PAROLA_HW
#define MAX_DEVICES 8


#define CLK_PIN   13  // or SCK
#define DATA_PIN  11  // or MOSI
#define CS_PIN    10  // or SS

// SPI hardware interface
MD_MAX72XX mx = MD_MAX72XX(HARDWARE_TYPE, CS_PIN, MAX_DEVICES);
// Arbitrary pins
//MD_MAX72XX mx = MD_MAX72XX(HARDWARE_TYPE, DATA_PIN, CLK_PIN, CS_PIN, MAX_DEVICES);

// Scrolling parameters
#if USE_POT_CONTROL
#define SPEED_IN  A5
#else
#define SCROLL_DELAY  50  // in milliseconds
#endif // USE_POT_CONTROL

#define CHAR_SPACING  1 // pixels between characters

// Global message buffers shared by Serial and Scrolling functions
#define BUF_SIZE  75
char curMessage[BUF_SIZE];
char newMessage[BUF_SIZE];
bool newMessageAvailable = false;

uint16_t  scrollDelay;  // in milliseconds

void readSerial(void)
{
  static uint8_t  putIndex = 0;

  while (Serial.available())
  {
    newMessage[putIndex] = (char)Serial.read();
    if ((newMessage[putIndex] == '\n') || (putIndex >= BUF_SIZE-3)) // end of message character or full buffer
    {
      // put in a message separator and end the string
      newMessage[putIndex++] = ' ';
      newMessage[putIndex] = '\0';
      // restart the index for next filling spree and flag we have a message waiting
      putIndex = 0;
      newMessageAvailable = true;
    }
    else if (newMessage[putIndex] != '\r')
      // Just save the next char in next location
      putIndex++;
  }
}

void scrollDataSink(uint8_t dev, MD_MAX72XX::transformType_t t, uint8_t col)
// Callback function for data that is being scrolled off the display
{
#if PRINT_CALLBACK
  Serial.print("\n cb ");
  Serial.print(dev);
  Serial.print(' ');
  Serial.print(t);
  Serial.print(' ');
  Serial.println(col);
#endif
}

uint8_t scrollDataSource(uint8_t dev, MD_MAX72XX::transformType_t t)
// Callback function for data that is required for scrolling into the display
{
  static char   *p = curMessage;
  static uint8_t  state = 0;
  static uint8_t  curLen, showLen;
  static uint8_t  cBuf[8];
  uint8_t colData;

  // finite state machine to control what we do on the callback
  switch(state)
  {
    case 0: // Load the next character from the font table
      showLen = mx.getChar(*p++, sizeof(cBuf)/sizeof(cBuf[0]), cBuf);
      curLen = 0;
      state++;

      // if we reached end of message, reset the message pointer
      if (*p == '\0')
      {
        p = curMessage;     // reset the pointer to start of message
        if (newMessageAvailable)  // there is a new message waiting
        {
          strcpy(curMessage, newMessage);	// copy it in
          newMessageAvailable = false;
        }
      }
      // !! deliberately fall through to next state to start displaying

    case 1: // display the next part of the character
      colData = cBuf[curLen++];
      if (curLen == showLen)
      {
        showLen = CHAR_SPACING;
        curLen = 0;
        state = 2;
      }
      break;

    case 2: // display inter-character spacing (blank column)
      colData = 0;
      if (curLen == showLen)
        state = 0;
      curLen++;
      break;

    default:
      state = 0;
  }

  return(colData);
}

 void scrollText(void)
{
  static uint32_t	prevTime = 0;

  // Is it time to scroll the text?
  if (millis()-prevTime >= scrollDelay)
  {
    mx.transform(MD_MAX72XX::TSR);  // scroll along - the callback will load all the data
    prevTime = millis();      // starting point for next time
  }
}

uint16_t getScrollDelay(void)
{
#if USE_POT_CONTROL
  uint16_t  t;

  t = analogRead(SPEED_IN);
  t = map(t, 0, 1023, 25, 250);

  return(t);
#else
  return(SCROLL_DELAY);
#endif
}

void setup()
{
  mx.begin();
  mx.setShiftDataInCallback(scrollDataSource);
  mx.setShiftDataOutCallback(scrollDataSink);

#if USE_POT_CONTROL
  pinMode(SPEED_IN, INPUT);
#else
  scrollDelay = SCROLL_DELAY;
#endif

  strcpy(curMessage, " ChiPDouro  **  Fechado   **  ");
  newMessage[0] = '\0';

  Serial.begin(57600);
  Serial.print("\n[MD_MAX72XX Message Display]\nType a message for the scrolling display\nEnd message line with a newline");
}

void loop()
{
  scrollDelay = getScrollDelay();
  readSerial();
  scrollText();
}
Convém lembrar que terá que ter instalado a biblioteca (MD_MAX72xx.h), que pode ser instalada pela própria IDE do Arduino: ir ao menu Sketch -> Instalar Biblioteca -> Gerenciar Bibliotecas e procurar MD_MAX72XX, de seguida clicar em Instalar.
Esta biblioteca já tem informações sobre os módulos das matrizes, não necessita de alteração, como referem alguns sites.
Neste projeto foi usado o seguinte material:
- Placa Arduino uno;
- 2 paineis led;
- Fios Conectores;
- Código.